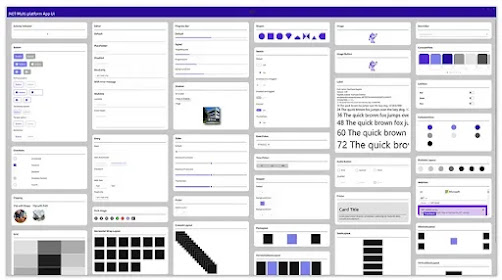
Wondering how to achieve the same look for your Xamarin Forms application on both Android and iOS? Learn how to implement Material Design in your Xamarin Forms apps and make this easy.
Xamarin.
In this example, the
Sample App
https://github.com/xamarin/xamarin-forms-samples/releases/download/143381/Xamarin_Forms___Material_Visual.zip
I hope you have understood how to use Material design in Xamarin.Forms.
Xamarin.
Xamarin.Forms code runs on multiple platforms - each of which has its own filesystem.
This means that reading and writing files is most easily done using the native file APIs on each platform. Alternatively, embedded resources are a simpler solution to distribute data files with an app.
Material ?
Material Design is introduced in Xamarin.Forms 3.6.
Material Design is a design system created by Google, that prescribes the size, color, spacing, and other aspects of how Views and layouts should look and behave.
- Visual="Material"
- Visual="Default"
Note
On Android, the material renderers require a minimum version of 5.0 (API 21) or greater, and a TargetFramework of version 9.0 (API 28).In addition, your platform project requires Android support libraries 28.0.0 or greater, and its theme needs to inherit from a Material Components theme or continue to inherit from an AppCompat theme.
First of All… What Do I Need?
➖ Add from NuGet Package the plugin: Xamarin.Forms.Visual.Material
➖ Let’s initialize Material Visual on each platform
Add the following lines after the
Xamarin.Forms.Forms.Init method:
On Android: In your MainActivity.cs:
On iOS: In your AppDelegate.cs:
It’s important to know the controls that are actually supported by Visual. These controls are made by Material renderers, which apply the Material Design rules.
| ➖ ActivityIndicator | ➖ Editor |
| ➖ Button | ➖ Entry |
| ➖ CheckBox | ➖ Frame |
| ➖ DatePicker | ➖ Picker |
| ➖ ProgressBar | ➖ Slider |
| ➖ Stepper | ➖ TimePicker |
Applying Material Visual
It’s so easy to use – you just have to add the Visual property to your controls.
On your XAML:
Also you can apply it in your C# file:
Visual property gets the following values:
🔹 Default: Render the view using the default renderer.
🔹 Material: Render the view with the direct parents renderer.
🔹 MatchParent: Render the view using the Material renderer.
Material Design components adhere closely to Google's guidelines. As a result, Material Design renderers are biased towards that sizing and behavior. When you require greater control of styles or behavior, you can still create your own Effect, Behavior, or Custom Renderer to achieve the detail you require.
Customize Material Visual
The Material Visual NuGet package is a collection of renderers that realize the Xamarin.Forms controls. Customizing Material Visual controls is identical to customizing default controls.
Effects are the recommended technique when the goal is to customize an existing control. If a Material Visual renderer exists, it is less work to customize the control with an effect than it is to subclass the renderer.
Custom renderers are the recommended technique when a Material renderer does not exist. The following renderer classes are included with Material Visual:
MaterialButtonRendererMaterialCheckBoxRendererMaterialEntryRendererMaterialFrameRendererMaterialProgressBarRendererMaterialDatePickerRendererMaterialTimePickerRendererMaterialPickerRendererMaterialActivityIndicatorRendererMaterialEditorRendererMaterialSliderRendererMaterialStepperRenderer
Subclassing a Material renderer is almost identical to non-Material renderers. However, when exporting a renderer that subclasses a Material renderer, you must provide a third argument to the
ExportRenderer attribute that specifies the VisualMarker.MaterialVisual type:
using Xamarin.Forms.Material.Android;
[] { typeof(VisualMarker.MaterialVisual) })]
namespace MyApp.Android
{
public class CustomMaterialProgressBarRenderer : MaterialProgressBarRenderer
{
//...
}
}
In this example, the
ExportRendererAttribute specifies that the CustomMaterialProgressBarRenderer class will be used to render the ProgressBar view, with the IVisual type registered as the third argument.
Note
A renderer that specifies an
IVisual type, as part of its ExportRendererAttribute, will be used to render opted in views, rather than the default renderer. At renderer selection time, the Visual property of the view is inspected and included in the renderer selection process.Sample App
https://github.com/xamarin/xamarin-forms-samples/releases/download/143381/Xamarin_Forms___Material_Visual.zip
I hope you have understood how to use Material design in Xamarin.Forms.
Thanks for reading. Please share your comments and feedback.
Happy Coding :)


